Making the first prototype is more about being able to discover where an idea might be weak than being done with the design.
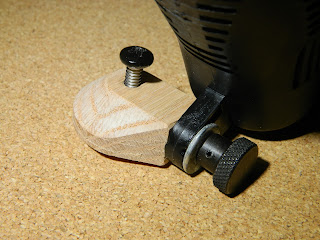
This version was cut from the same scrap of red oak as the first two were. I removed much of the initial potential mass in the first design. This version removes only the outer bevel where no forces would pass through. The beveled edge was cut with a 3/16" end mill using the fluting toolpath that is available in Vectric's Aspire software. The side hole was drilled out with a #7 drill bit then tapped for 1/4-20 threads.
The center cone spreads force from the screw head across the bottom area against the rig post. The side bolt simply threads into the initial mass for strength.
The lights now do a great job of illuminating whatever I want to make a close-up photograph or video of. Next for this camera rig I'm working on an improved camera hanger bracket. So far I'm not satisfied with my first or second ideas. The second idea is shown in the last photo above. It worked, but not as well as I hoped it would. That tells me there is a better solution out there. Now just to find it.
4D


No comments:
Post a Comment