A simple rabbet at a corner joint does at least provide one reference side when it comes time to glue up the corner. Not much better than a simple butt joint, but it adds a little more end grain to face grain glue surface area. Throw in two or three screws and this corner becomes quick to glue up. The screws serve to clamp it tight. The screw heads can be covered with plugs made from the same wood as the side or contrasting wood for some detail effect. This corner will be the hardest to break apart thanks to the screws.
 |
| Marked out to ensure the right location |
It helps to mark out where the cut will be made to make sure it isn't cut on the wrong board or on the wrong side of the correct board. The boards used here are 5/8" thick. The rabbet width is thus 5/8". Depth of the rabbet can vary, but here we decided to make it 1/8" deep to leave enough wood behind it to embed screw heads into. A 3/4" diameter flat router bit used in a router table with 5/8" of it exposed outside the fence is a good way to cut the rabbet. Backing up the cut with a scrap board is recommended. . Notice in the photo above that the length of the board, if the rabbet is only 1/8" deep, will be 1/8" shorter than the opposite board with the rabbet/dado joint. Be sure and account for the different board lengths due to the joint being used.
Make sure the router is unplugged while you set it up. You can set the exposed width of the router bit easily using one project board and another scrap of wood in front of it. Make sure the tip of the bit is as far out from the fence as possible. You may need to rotate it to get there. Once the bit just touches the outer board make sure the fence is tightened down. 5/8" of the bit now projects from the face of the fence. .
 |
| Setting bit exposure width |
You can set the exposed height of the router bit using a simple ruler or any of several gadgets available for setting blade or bit height. One shop trick is to use two 1/8" drill bits with a board laid atop. It is an easy way to set the bit height to 1/8" above the table surface. Raise the bit until it just touches the board above.
 |
| Setting bit height |
Counterbore vs countersink? We countersink flat head screws so the head is flush with the wood when it is tight. To counterbore is to end up with the screw head tight but beneath the surface of the wood. Below the surface of the wood you can use pan head screws rather than flat head screws. Flat head screws act to wedge the wood open as they tighten down. Near the end of a board the last thing you want is to have the wood split. A flat bottomed counterbore bit such as this one: Amazon Link is perfect for using pan head screws in the joint.
The screws made for pocket hole joints are self-tapping pan head screws. Care must be taken to avoid splitting the side board that the screws thread into. For a good reliable screwed joint three different drill bits, or a single combination bit should be used. The three bits would include a 3/8" bit for the counterbore, a second bit for the through hole that the screw will slip through but not thread into, and a third bit into the end of the joining side board. This should be the size of the inner shaft of the screws so the threads will cut but not try and split the wood.
One tip is to drill the holes for the screw before you cut the rabbet. Occasionally when drilling through a board the grain will blow out. In this case the rabbet cut done after drilling the holes will remove any damaged area.
Lay out where you want the screws. A line drawn 5/16" from the edge will be on the center of the joining board end. Locate where on that line you want the screws to be, and use a center punch to put a dent. The dent will help the drill bit start exactly where you want it.
 |
| Layout and Centerpunch. |
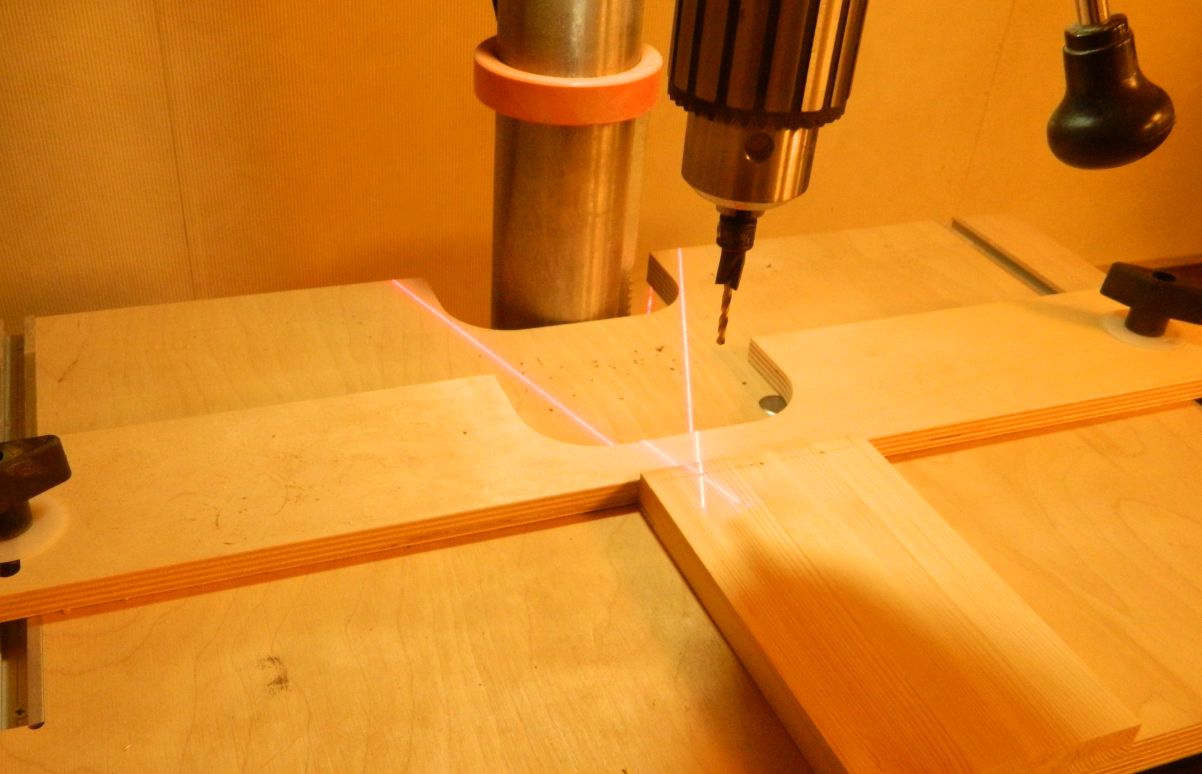
While you can use a hand drill to drill the holes, it is wiser to use a drill press if one is available. A fence on the drill press bed can be set 5/16" from the drill bit center to ensure all the holes are the same distance from the board end.  |
| Fence set. Laser Aligned |
Some woods are brittle enough that they may tear out when hit with a spinning drill bit near the end. Proceed slowly. Hold the board firmly. Start with a 3/8" spur bit, and set the depth stop on the drill press to drill no more than 3/16"deep. If you can clamp down your board after aligning the bit to drill, you can place a thin scrap of 1/8"plywood over your board to drill through. That should prevent tear out on your board. |
| 3 Holes Counterbored |
Once the holes are drilled go ahead and cut the rabbet. Be sure and back up the cut with a scrap block. Hearing protection strongly advised. The only thing left to do is drill pilot holes for the screws in the ends of the mating side piece. That, and look for a plug cutter that will make 3/8" diameter plugs. While looking you can contemplate what wood you want to make the plugs from. A small scrap is all that is needed.
On the adjoining board end it is best to layout, mark, and centerpunch where the screws will enter. |
| Marked and Centerpunched |
At the drill press, lower the table so the board can fit under the bit. Using a bed vise, or simply left assembled so it stands vertical, align the marks with the drill bit. When drilling it is best to jog in and out as the bit progresses to let the chips clear. Otherwise the bit will become clogged and heat up. Set the depth stop to drill approximately one inch deep. Choose the bit size to match the shaft of the screws but NOT the thread diameter of the screws. Threads will cut but the screw shaft won't try to split the board.  |
| Pilot holes drilled |
Screwing into end grain a screw with coarse threads is best. The screws available for pocket screws are ideal.  |
| Pocket Hole Screws |
These screws should drop through and not thread through the holes drilled in the rabbeted board. That hole diameter should match or be just a bit larger than the thread diameter of the screws used. When assembling the screws will pull the rabbeted board tight against the end of the mating board.  |
Screws in place.
|
A plug cutter works best when used in a drill press. Face grain plugs can be cut that match the wood they insert into, and might nearly disappear when in place. Here I've used a scrap of walnut to make plugs with. |
| Plug Cutter in Drill Press |
There are better plug cutters available than the one I show being used. Mine is a bit dull and struggles to cut into the walnut scrap, yet it still makes useable 3/8" diameter plugs.  |
| Small Screwdriver |
A small screwdriver can be used to break the plugs free from the scrap board. Be patient before gluing these plugs in over the screws. The box sides still need to have a slot cut for the bottom of the box. The screws can still be removed so all the parts can be laid flat on the router table.
Once the box is finally glued/screwed together the plugs can be glued into the screw counter bored holes. Let them stick out. Wait for the glue to dry/set. The excess plug that sticks out can be rough trimmed off at the band saw, or with a chisel. A flush trim bit in a router table can trim what is left flush to the board surface.
Comments and Questions are encouraged!


No comments:
Post a Comment