Search This Blog

Showing posts with label creative joinery. Show all posts

Thursday, July 24, 2025

Stretching Stretcher


Identical halves

Slide together
On occasion I've bumped into the conflict of a solid wood small table top that has grain running 90 degrees from the direction of the stretcher(s) below.  As wood likes to swell or shrink in width as the seasons change the distance between attached end leg frames changes.  In theory any stretcher between would need to grow or shrink in length to accommodate that structural flex. A tenon on each end keeps the stretcher square to the end frame, and a sliding dovetail embrace between the two halves should allow this stretcher to stretch. Tight together in the winter when the humidity drops, and slid open as much as 1/4" when spring arrives and humidity rises. 

This isn't a common problem as experience fabricators know how to orient wood grain to reduce conflicts on assembled wood furniture.  In fact it was only one past student of mine who's design could have benefited from this idea.  That was more than 2 years ago before I retired. I post it here to rid it from my creative mind.   

4D

Monday, March 17, 2025

Whimsy in Design. Magnetic Appeal.

Whimsy
I started with a small table top made for a rejected project.  I added in a couple of 36" long 3/8" diameter dowel rods I've had for a couple decades or more. I cut them in half to be the legs.  Then I made 4 wood balls.  I mixed in some 3/8" diameter magnets left over from a previous project, and this is the result. 

I drilled holes for the dowel legs in the bottom of the table top using my CNC.  I wanted the dowels to angle out rather than stand straight up, so the CNC jig was tilted 5.8 degrees down from horizontal. 
On my Compound Angle Clamping Jig 
Rather than glue the dowels in, I embedded magnets into the bottom of the CNC drilled holes.  Since wood won't stick to a magnet, I inserted metal screws into the ends of the dowels. The biggest challenge was centering the screw heads on the dowel ends. A bit of filing might have happened to make them slip easily into the holes. 
Embedded Magnet
The holes in the top were limited in depth by the screws that held the magnets in place. Any deeper and the screws would have poked out the top.  An ideal design would have deeper holes to better brace the inserted dowels. 

For feet I made wood balls, 1.5" in diameter.  They need a 3/8" diameter hole in them.  They will get magnets in the bottom of the holes and as such also stick to the screws in the ends of the dowels.  For whimsy I'll painted one of them red.  Experience tells me the one red shoe will make the table more memorable.  

I gave my CNC rotary axis a chance to prove it could make wood balls.  
Five Maple Balls on my Rotary Axis

Five 3/8" Diameter Holes

One Ball, ready to trim. 
Four wood ball feet.  Ready for magnets and a finish.

Rare earth magnets hold all the parts of this table together.  You could replace the wood dowels with steel rods and skip having to add screw heads to the end of the dowels.  That would add considerable weight, sterilize the composition, and require paint to prevent the metal from rusting.  The wood dowels are just enough.  No more than needed to hold up the top. When whimsy strikes you can pop off the ball feet and replace them with perhaps a seasonal color alternative.  How about 3D printed shoes to slip over and magnetically stick to the dowel ends?
 
All projects survive longest if the parts have some finish on them.  I set about first applying clear finish to the wood balls.  No problem with the first three, but the 4th ball protested.  It tried to escape by rolling off the bench, but I caught it. It got so angry at the thought of joining the clear finish crowd that it turned red in the face.  In the end it got its way.  Meet the angry red shoe.  I may have to rename this post as "A Table with One Angry Red Shoe.  
One angry red foot.
The ball feet balance the composition.  An echo of the thick top. They recognize the thin dowels as official table legs. Although this little table stands up proudly, the thin dowel legs happily flex a bit, and a bump against the table top will reward you with a quick wobble dance. Not a table you'll want to sit on. Not a table for anything like a small TV.  Park the TV remote and maybe a coaster with a drink on the top. A frail little table such as this one needs a place out-of-the-way.  Where no one might accidently bump it.  Not in the open where predatory beasts in the house might find it. A more stout version with thicker and stiffer legs would eliminate the wobble, but also remove the joy the table elicits when it does dance a bit.  😉

Comments welcomed and appreciated.
4D

Saturday, October 14, 2023

Splined Miter. A Simple Corner Joint that also Simplifies Glue-up of a Box or Cabinet.

Spined Miter Corner
This is the second of four different corner joints it is useful to know about.  Best cut using a  table saw with a miter gauge to add some safety to the cuts.  It helps if the table saw blade is close to the same thickness of 3mm thick plywood as plywood's alternating layers make for a strong spline.  You can use wood as the spline if you make sure the grain runs across the joint rather than parallel to it.  On long mitered sides it is best to use the same material for the spline as the sides. Wood expansion/contraction  as humidity changes can create a shearing force that will lead to failure of the joint if the spline won't expand with the sides.

Material used was 5/8" thick.  The spline slot cut was 1/8" wide.

You can use a router table to cut the spline slot on small parts, but it requires a jig to hold the sides up at 45 degrees.  That or a router table that can tilt up 45 degrees. 

The initial miter cut can be cut on the table saw, or on a compound angle miter saw standing up or laying flat.  The height of the sides limits the use of the miter saw.   I have close to 6 inches of cut height on my Bosch glide saw, and 14 inches or so of cut length.  I get better result standing the sides up to cut so my limit is 6" of side height to cut them on the miter saw.  

Table saw blades might leave a V bottom in their cuts.  If you can find a blade that leaves a flat bottom it will make a flat bottom spline slot. The blades in a dado set are usually flat tipped so it might be worth changing to a single 1/8" or 3mm wide dado set blade.  A simple test slot cut using the table saw will reveal how flat of a bottom it leaves the slot.

To leave the joint strong it is best to have the spline slot closer to the inside of the corner, and not cut any deeper than half way through the sides.  When setting up the table saw to cut this slot I marked where I wanted it and transferred the position to the top/outside of the board. This helped me align it with the slot already cut in the miter gauge face.
Slots Cut

Using a miter gauge on the table saw to push the board through the saw blade is best done and easiest to align if you add a fresh face board to the miter gauge for the cuts.  Some friction tape on the front of the face board will help keep boards from sliding left or right when being pushed through the saw blade.  
Slot in Gauge Face Board
A stop block clamped to the miter gauge board can ease alignment for the cuts.  It is important that the slot position matches on mating sides.  Many miter gauges have a built-in sliding stop block, and you may be tempted to use it.  On a simpler set up a board clamped to the face board will do.    Best place for a stop block is at the tip of the mitered corner. 
Stop Block Position
Is a splined miter any stronger than a simple miter with no spline?  For simple boxes, it doesn't matter as there normally won't be any forces trying to pull apart or warp the corner.  The advantage is in gluing up the box.  The spline keeps the sides aligned when clamping together.   The addition of glue surface area should offset any weakness introduced from the  slot cut.

Questions or Comments welcomed!
4D   

Wednesday, April 6, 2022

A Simple Finger Joint Jig for the Router Table

This simple jig makes cutting finger joints on box corners fairly simple to set up on a router table.  Variations can be made quickly for fingers of different sizes. 

It uses a piece of 3/8" x 3/8" x 12" long steel key stock, embedded 1/8" deep in a piece of 12mm birch plywood. This provides a guide rail for making the repeated stepped cuts for finger joints.  

Backboard Sled
The backboard sled has a slot cut in the bottom which sets over and slides on the key stock rail.  The center flange of this sled helps keep the sled square and face vertical. Join it to the bottom and face with French dovetails.  It can have a hand hold cut in it and the shape rounded for a more comfortable hold. 
Center Flange with Handle
A 3/8" spiral end mill peeks through a hole in the base which is slightly larger and 3/8" away from the rail.  Clamp the base down to the router table top on two opposite corners. Adjust the bit height to match the thickness of the boards above the base.  To adjust bit spacing from key stock loosen one clamp and bump the base slightly. 
Base with Key Stock Rail. 
To help the jig work smoothly apply some paste wax to the sliding surfaces.

Jigs for smaller or larger fingers can be made using key stock to match the router bit diameter. 1/4" key stock for 1/4" fingers.  1/2" key stock for 1/2" fingers. 

Amazon.com: 3/8" x 3/8" x 12" keystock.


Friday, May 13, 2016

Creative CNC Joinery, and Other CNC-Cut Solutions.

Text and photos in this and every other post of this blog are copyrighted. 

My furniture design students often came up with designs/parts that looked difficult or impossible to build.  We have 3 CNCs now in the design workshop, and two of them have been modified to allow CNC cuts on boards mounted vertically or at an angle or compound angle. When you are released from the limitations of flat cutting a world of potential is revealed. What seems impossible or difficult to make at first often becomes possible with a little sketching, drafting, jig design, experimentation, determination, and innovative tool path creation.

It is important to understand the structural properties of the materials used when trying out an original joint or cutout.  Grain direction, wood expansion and contraction, dryness, natural flaws, stiffness, flexibility, and tendency to split, are just a few of the things to consider.

Some examples of the original CNC-cuts solutions I've come up with:


Three-way center interlock:


We have our advanced students design and build a 3-legged (or fewer legs) stool during the first two weeks of class. When 3 legs need to be connected with a stretcher there are only a few options.  You can run stretchers from leg to leg around the perimeter. You can bring stretchers to the middle, pin wheeling them to each touch the other two. You could bring them into a center hub piece. The simplest way at first could bring them to meet at the very center, except there is only a small area of intersection you can make a 3-way joint within.  A 3-layer "stack" would work, but removes 2/3 the thickness off each stretcher, and leaves the center piece needing to be cut on both sides or from the top.  My 3-way interlock maximizes glue surface area, maintains through-grain structure. vertical stiffness, and still locks the three elements together within that small area. You cut the same profile on the ends of each piece from the top. This pattern can be scaled up or down to match the width of your stretchers, and is only limited in height, diameter, or by the length of the bit you'll use to cut it. One application for it:  
3 on 3, connected with a center bolt.

Angled through-scarf-lap joint:


Often a project requires one board to appear to pass through another. If the same size they can be half-lapped. If a smaller piece is at the edge of a larger piece you can still interlock both with cuts into their edges.  When a small board penetrates the center of a wider board the options are limited. Cut the through board and pass a dowel through the larger piece into these cut ends. Or half-lap the through board inside a hole cut through the wide board.  You could make short tenons on each cut end and mortise them half way into the wider board.  

The result from all of these options is a joint that is weaker than the original strength of the through piece.  My angled through scarf lap joint maximizes side grain glue surface, maintains strength at the ends of each half, and is invisible once glued together. Sloped halves meet inside the joint. This sloped intersection wedges out as the parts are clamped in, leaving them very tight inside the hole.

Compound angle mortise and tenons:

In chair frame design a potentially more interesting and inviting solution can be found by flaring the sides out, wider in plan view at the front than the back. A more stable footprint can be found by flaring the legs out, wider in front view at the bottom than at their tops. The challenge this creates is that now any structural connections (stretchers) between the two sides would meet the sides at a compound angle. By first cutting the extended (by the length of the tenon) end of each stretcher parallel to the face of the side it will intersect, and then clamping that stretcher on the CNC so that compound end is perpendicular to the CNC bit, we can cut a standard tenon to go 90 degrees into the angled sides, at the compound angle relative to the stretcher required.

Half blind mitered dovetailed corners:

This half blind dovetail example was a request from a student in my CNC focused furniture joinery class.  He had found a photo example online, and as far as my research got it looked as though you could use a jig on the router table to cut half of this joint, but the other half would need to be hand cut. The CNC solution came to me one night and required making a jig to hold his panels under the CNC at 45 degrees, and once we had that we could cut both halves of a slight variation that looks exactly like the original example.  This joint can also be cut for 72 degree (5 sides) and 60 degree (6 sides) corners. I made a 5-sided box with the dovetails laid out to spell my name in Morse code just to inspire the students.

Creative through-finger joints:
Triangular pins.  Walnut centers.

Pseudo Dovetails
Once you are able to cut vertically on a CNC an obvious joint to make is the box joint. But now that you can make box joints with the precision and control of a CNC, the different sizes of router bits available present options for amazing creativity in the shape of the interlocking fingers. A pattern drawn for the positive side of a joint can be used with only a little modification to make the negative pattern for other side. The round shape of each bit and length of the cutting edge are the only limitation, but results can be as varied as your name in through-fingers, Morse code in dots and dashes as through fingers, or geometric patterns or progressions as through fingers.

A Challenge by a Fellow Professor. 

Finger (box) and dovetail joints on other than 90 degree corners.

It is rare to see a 5-sided (or 3 or 6 or 7 sided) box in an internet search for wood boxes. Why?  Most woodworking equipment is set up to work at 90 degrees. Four 90-degree corners make a 4-sided box.  In furniture design a 100 degree or 105 degree angle between chair frame parts might be more interesting than 90 degrees, but traditional methods of creating joinery at those odd angles limits their use.  To make fingers on a 5-sided box each end needs to be cut at 72 degrees. An angle jig (set at 18 degrees) on the CNC will let you clamp these sides under the bit so their 72 degree end is perpendicular to it.  The same strategy can be used for more complicated joinery on non-90 degree corners, however some joints may need clamping ends at two different angles.

Of course, a CNC's precision can always make perfectly centered "ordinary" finger joints no matter the width of the board used
.


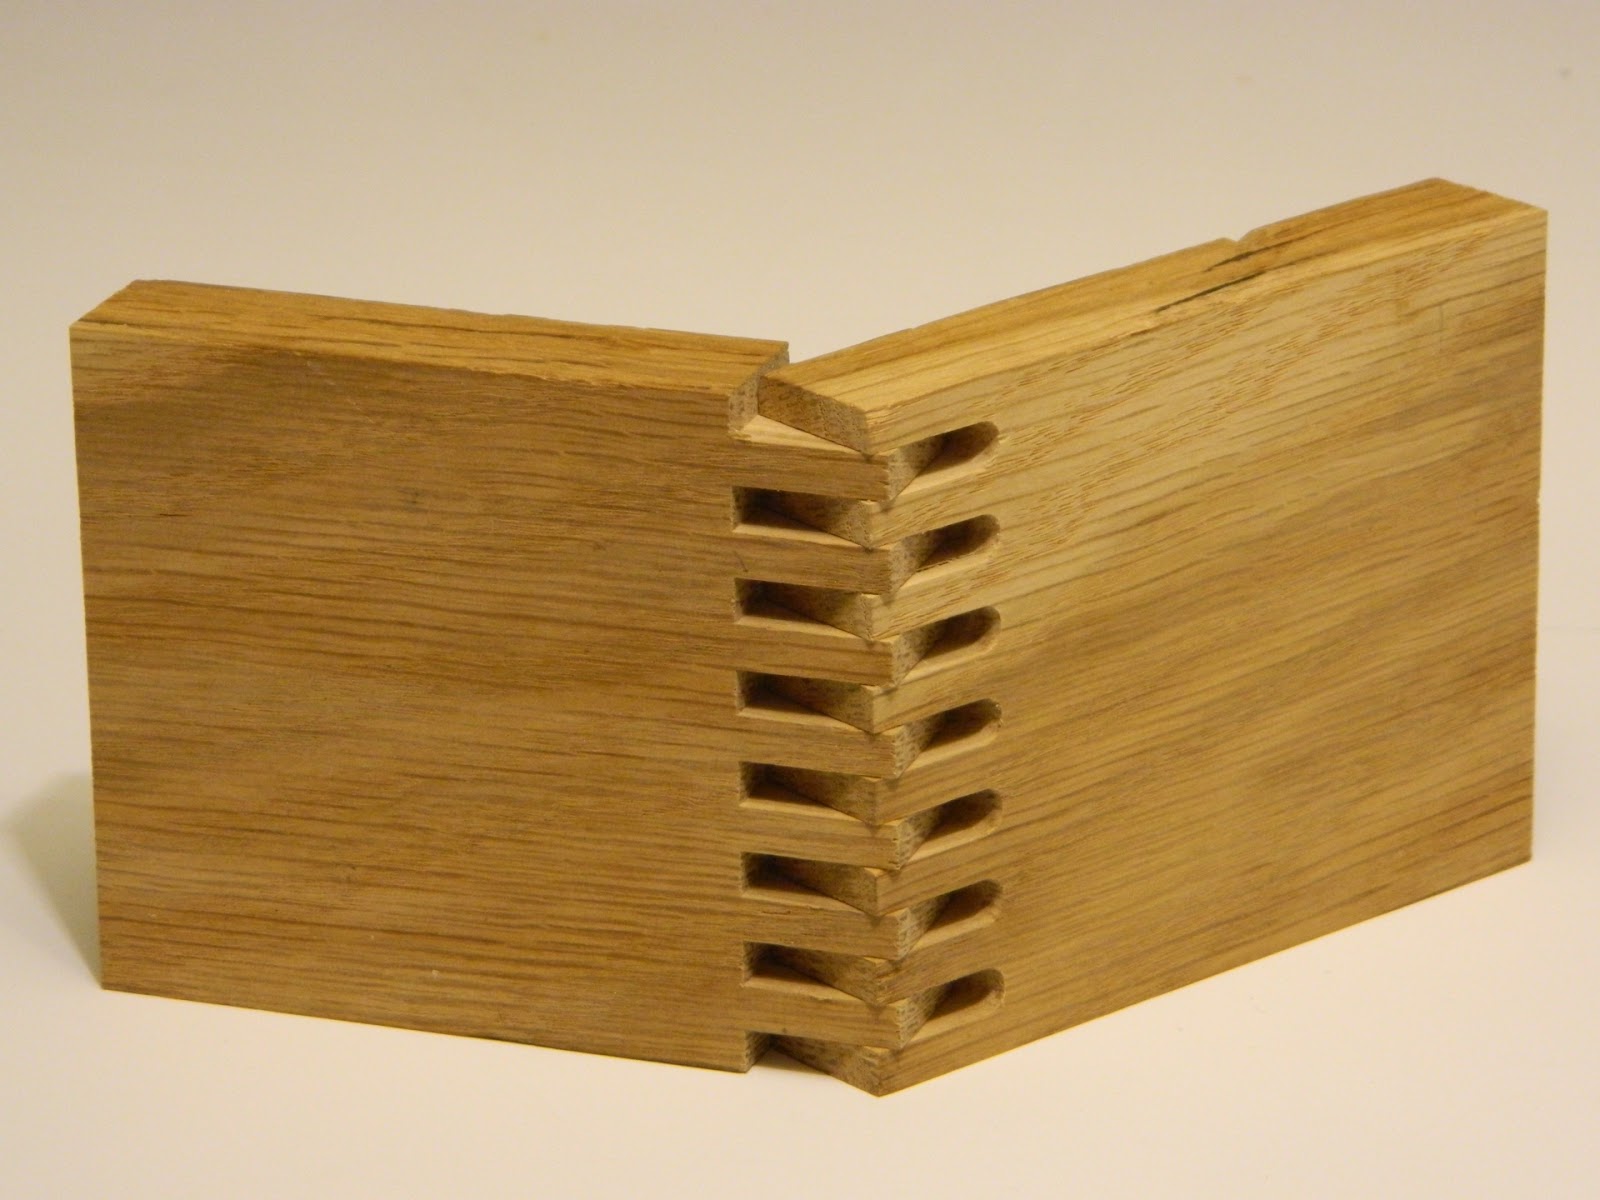
Pin Joints.  These examples are an experimental set of fairly conventional joints, with the added strength from fingers/pins cut in the end grain of one part to pierce the other part of the joint.

Reinforced with 3 finger tenons.

Angle intersect...

A simple butt joint?

Not so simple.  4 x 5 end grain pin array.
Pins add a great deal of glue surface area for these joints. They are difficult to pull apart without glue. With glue the wood around the joint would fail before the joint does.
Simple rabbet?

2 x 5 pin array hidden inside.
Shoulder Rabbet.
Back side: Shouldered rabbet.
Hidden end-grain pins.
Pins full depth of joint.


Through Pins.  End grain should pop with finish. 

Hidden (blind) finger row on 45 degree board intersection.  Fingers cut in end grain don't always have to be on the ends of the two boards that are being joined.  When one board has to intersect the middle of another board a row of tenons into matching slots will still be a strong joint.  When the boards don't meet at 90 degrees an angle clamping fixture can still help cut a working solution.


An alternative to the 45 degree joint above, with a slightly different look would be this triple tenon version:
Slot half was cut while clamped at 45 degrees.  Tenon half was clamped vertically.


Predetermined alignment of cutouts on bending plywood laminations.  Curved parts can be made by gluing together layers of thin wood or bending plywood around a form.  If the part has cutouts they can be difficult to cut after being curved. With the CNC these layers can be individually cut to include the cutouts, with each layer slightly different than the others to account for their position in the stack.  One good example is this aquarium stand.  Inner layers are shorter than outer layers, so we reduced each layer by a fractional amount so that the holes would only line up after being clamped around the form. Extra holes were added for pins to keep the parts aligned while the glue dried.


Tapered sliding dovetails, positive and negative halves.   The angle, width, and length of most dovetail bits can be found on the packaging they come in, or etched on the bits themselves.  Knowing this it is possible to lay out a single depth tool path to run that dovetail bit down a tapering path to cut the slot in a board's face and both sides of the projecting dovetail on another board's edge or end. The plunge for a dovetail bit usually starts outside of the board.  Slots are best cleared out with a pocketing straight bit before the dovetail bit undercuts the sloped sides. Blind slots can be cut with the path line entering then doubling back.  A small degree of taper down the length of the dovetail slot lets the joint slide in easily yet lock very tight once fully inserted.

Angled slices through cylindrical shapes as they turn on a rotary axis.  A sine wave pattern was necessary to have the router cut what appears to be a straight 30 degree slice through these cylinders.

Sine wave pattern used to cut recess for aluminum.

Ramping dovetails.  When two boards meet at a low angle to each other, such as the a-frame sides on this cart, you only have a few options on how to connect them using just the initial mass of each piece.  You could butt-glue them edge to edge, but the standing V wants to do the splits and may still split this joint apart.   Looking at how much they overlap before being mitered a single option remains for a joint that will increase glue surface area and interlock the two halves.  You can cut a dovetail slot in one side and leave a dovetail tongue on the other. These will ramp together, locking the two halves when flush at the top.

Mitered corners with splines.  This example needed a little cleanup with a 1/8" chisel to remove the fillets left by the round 1/8" bit.  The opposing splines help when gluing this joint together as they keep the mitered faces from sliding apart under clamping pressure.


Construction Lumber Joinery.  These examples show how a building (Tiny House in my case) could be put together using CNC-cut joinery rather than nails.


The joinery options shown and described here just scratch the surface of what is possible when you can clamp parts vertically or at any angle/compound angle under a 3-axis CNC.

The rig I use to clamp parts vertically or at any angle is described here.

Several other CNC cut joints I've document in these posts:

Comments and questions are welcomed.
4D