I've got a new benchtop tool on order and it needs a stand to rest on. There will be associated accessories for this tool so a drawer to keep them in will be useful. The top of the bench has been made and was made from a 25" x 48" x 1.5"thick butcherblock panel purchased from my local Menards. See here how I made the rectangular panel into a square panel: Square from a Rectangle
To access the tool without having to bend over the bench will be 38" tall. The legs will be similar to those I made for the prototype bench you can see here: Hobby Bench
Made from 4x4 (3.5" x 3.5") Cedar legs and 12mm x 5.75" plywood stretchers the flared stance should be sturdy and steady when the machine is in motion.
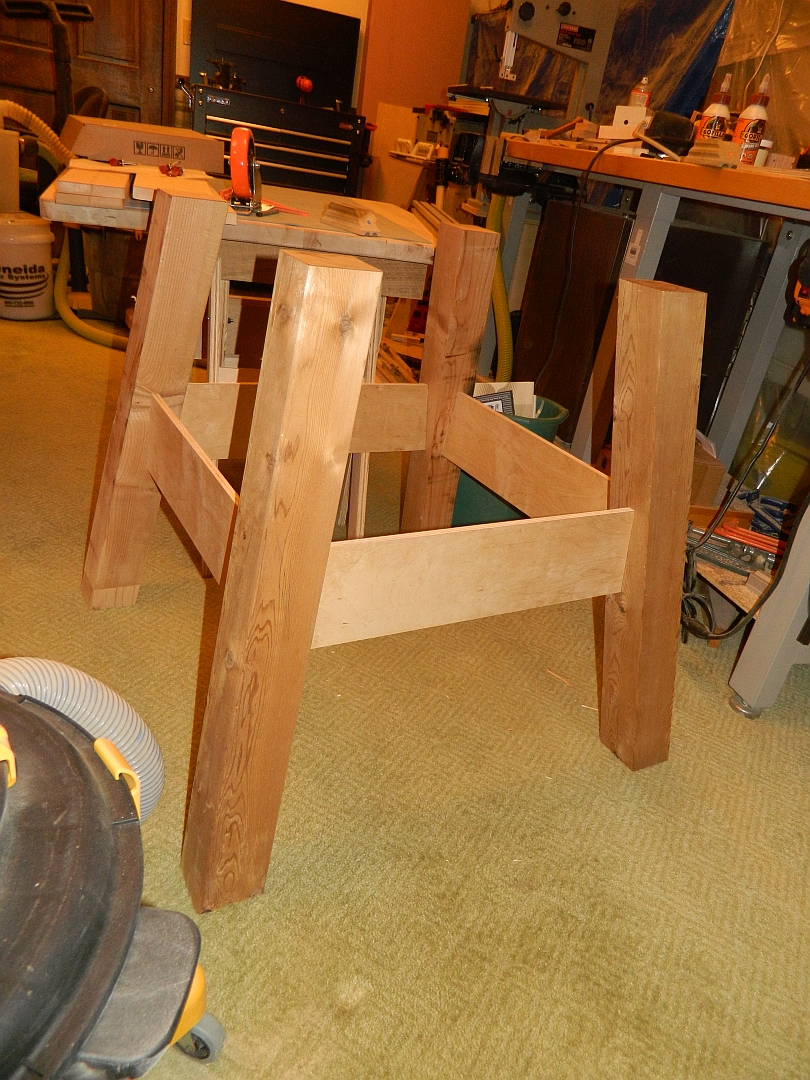 |
| 8 degree legs |
The drawer will use 24" long soft closing full extension drawer slides. The stand may eventually have casters.
I found 6' long 4x4 cedar posts at my local Menards store. Fortunately six feet of material is the longest I can fit in my small car. Six feet of 4x4 is enough for 2 legs. I made all 4 legs with very little waste from two 6' long posts. My Bosch Glide compound miter saw was used to cut the top and bottom compound angle on all 4 legs.
The tenons on the end of the 12mm thick plywood stretchers were cut on my CNC. They were clamped vertically in the X plane and held at 8 degrees relative to the Y direction.
Mortises on two sides of each leg were also cut with the legs on my CNC. They are at an angle to end up vertical in relationship to the angled legs.
 |
| Mortises at 8 degrees |
To make the drawer side rails I split a pine board in half and ran both halves though the drum sander until the bandsaw marks were gone. I cut the two pieces in half lengthwise, then glued each half side by side to make two wider boards I can use. A new resaw blade on my bandsaw took awhile to install and set up, but did a nice job of splitting the pine board in half.
For the two drawer sides I found two 6' long pine 1x3s that would do. I cut them in half lengthwise, then joined one edge on each piece before gluing 2 together x 2 stretchers. With the glue dry I scraped off any beads of glue, then took all 3 stretcher boards out to my drum sander to clean them all up. They ended up 3/4" thick.
Next came finalizing the design drawings and verifying the dimensions that all the parts needed to be.
Drawer rails were made, including the tenons on the back angled end. Mortises for those tenons were cut on the top inside edge of the two rear legs. A pocket for the rails has been cut on the side of the two front legs.
Legs will have their outer corner rounded over by a 1" radius round over bit. The outer two faces of each legs have been cleaned up and made square to each other on my small jointer.
 |
| Fence for 1" Radius Roundover Cutter |
For the drawer I've decided to use finger joints on the corners. I've already CNC cut the profile for the drawer slides on the two sides of the drawer. I cut the finger joints on the 4 corners of the drawer box. I used a 12mm router bit to simplify making a slot in the box sides for the 12mm plywood bottom. While I could make a 12mm wide slot with two passes of a 1/4" bit, it simplified the job by having a 12mm bit for that task. Most 1/2" plywood sold these days is actually 12mm thick.
Drawer assembly started with one end (two corners) being glued up.
 |
| 24 inch deep drawer. |
 |
| These rails will hold the drawer slides for the drawer. |
 |
| Finger jointed corners |
 |
| Assembled drawer |


No comments:
Post a Comment