Search This Blog

Showing posts with label Creative CNC Joinery. Show all posts

Tuesday, April 14, 2026

UpDn Diamond Corner Joint

UpDn Diamond Interlock
This is another test corner joint.  It uses a 1/8" end mill rather than a 3/16" end mill to cut both sides. The same initial vector was used for both sides.  For the male side a perimeter line around the end was added so it would pocket out the surrounding wood. On the female side a profile beside the line and clearing profile on the line were used to cut the negative shapes. 
Female Side. Walnut
For contrast the female side was cut on the top end of a walnut board.  The male end was cut on end of an oak board.
Male Side.  Red Oak
Not knowing how exact the dimensions of the bit used were, I made two toolpath versions of the male side.  One with no added allowance, and the second removing an additional 0.003" to allow for some glue room if the first toolpath was too tight. 

The female side was cut first, clamped vertically in my Bridge Vise.  The impractical aspect of such joints done with a 1/8" bit is that it take several passes and considerable time to step down 3/4" around and inside the diamond shapes. 

The male side was cut clamped flat across my bridges with its end hanging over open space.  After it finish I checked the fit and found it too snug to slip together easily.  I made a profile pass with a .003 allowance and recut the end.  Second try the other side slipped on smoothly with no extra force needed.  
Both Sides Cut.
The straight grained oak helps emphasize the contrast.
Nice Contrast
Partly together.
Almost
Fully together.
Fit is perfect with a 0.003" gap for glue.

Once glued together, sanded, and with some finish applied this joint would be a nice surprise to discover on the sides of a kitchen drawer when opened.  It should easily be as strong as a dovetail corner joint. 
With one coat of Tung Oil
The interlocking diamond pattern might be nice for the corners of a jewelry box. With a 1/8" bit as long as your boards are thick many variations can be made for corner joints like this one. Imagination, knowing how to configure a CNC for vertical (and angled) cuts, and some understanding of wood properties are all that is required. 
4D 


Sunday, April 12, 2026

Square Interlock Corner Joint

Square Interlock Joint
This joint, cut on my CNC, could easily replace half blind dovetail corners for strength.  It can only be assembled in one direction.  It won't pull apart sideways.  As with many of the CNC joints I've come up with it uses the same vector for both sides of the joint.  One side is cut on the end of a board clamped vertically.

Side A. Clamped Vertically

The other side is cut on the end of a board clamped horizontally. 

Side B.  Clamped Flat.

This joint is half blind, showing only on one side of the corner.  

All the corners are rounded to account for the 3/16"diameter end mill used to cut the joint. A sharper cornered version could be cut with a 1/8"diameter bit if the cutting length of the bit was as long as the boards are thick. 

This sample I made from some pine board scraps.  When both sides were cut they slipped together easier than I expected.  This suggests that the bit I used was a little bit larger than .1875" in diameter.  More than enough room for some glue. 

Sample Ready to Assemble
The positive and negative sides together look a bit like a zipper.   
Partly Together
Drawer sides would be a good place to use this joint.  A drawer that holds sewing supplies would be a perfect application for it!
Glue Together and Sanded Flush
As with dovetail joints, the spacing between squares could be varied for a more personal design. Your imagination and the size of router bits available are the only limiting factors. 

4D

Friday, October 3, 2025

Low Angle Dovetail Joint

I found this joint sample hiding in a box of CNC-cut joinery samples I made for students to consider when designing their project. 

For Low Angle Corners

One half slides into the other half.

Not quite as simple as it looks to cut
I endeavored to figure out how to connect wood pieces at any angle with a CNC-cut joint while I was teaching.  This is an extreme sample that I don't remember ever using for a student project.  The left half in the photo above is the complicated one to cut.  The sides taper in as the bottom of the dovetail is narrower than the top.  

This sample will return to the box I found it in to wait hopefully for the day when it can come out to inspire a real corner connection on an actual project. 

4D 

Sunday, August 10, 2025

Mortise and Tenon Miter Joint?

 This sample languished forgotten in the bottom of my box of Sample CNC cut joinery.  I was sorting out that box and nearly threw it away as it appears to be a simple miter joint.

Looks Simple
Pulling it apart reveals the inner mortise and tenon that hold it together.
Surprise Inside!
The tenon was cut from what is normally cut off to make a miter joint. Mating mortise cut on the other side face. There is no weak cross grain in the tenon. This tenon also keeps the faces aligned when gluing up the miter. While I cut both sides on my CNC, I'm pretty sure this could be duplicated by a clever craftsman without using a CNC. 

Very much the best of two joint types working together to make a strong connection where there is normally a need for added reinforcement. 

With wider boards, each side can have a tenon and a mortise.  Identical cuts using a CNC.  Tenons on each side slide into the mortises on the other side. 

Comments encouraged!

4D 


Tuesday, August 5, 2025

Steep Dovetail Corner Joint


Face to Face
This is a sample I made to show my Furniture Design students one way to connect wood at a steep corner.   A variation was used to connect the top of A-frame legs on a CNC controller cart the students made. The parts slide together, so technically this is more of a French Dovetail solution. 
Open for Inspection
Careful layout of vectors was require to guide the dovetail bit.  Each half had to be clamped at an angle so the bit could travel level through the ends. My compound angle clamping fixture was used for that task. 
One half slides down into the other
There is a taper to one side of the cuts to compensate for the wide top sliding down to the narrow base of the dovetail shape. This joint only slides together in one direction. 
Tails into Slots
Once together there is no play between the halves,  Snug tight.  This sample has been abused for inspection by students and is a bit worn.  A little glue and the dovetail interlocking would make a very strong steep corner joint. 
Snug Together
I am considering using this joint for the corners of a triangular mantel clock box frame.  With a shallow dovetail corner variation at the top of the triangle. 
All Stood Up
Ends were trimmed so when assembled the end would be flat across. At the top the dovetail pattern is evident and interesting. 

I realize this steep angle is a rare occurrence in projects.  Knowing this joint is possible and how to cut it though keeps it on my menu of options when designing furniture and accessories.  

Comments are encouraged. 

4D

Sunday, April 6, 2025

Tapered Radial Finger Joint

Tapered fingers
Mating side


Advantages: 
- The two halves slip together easily. 
- They fit tight when fully together. 
- When assembled they have a unique look.
- Mating surface don't touch until fully together.  No scraping off glue when assembling.  

Renders above are from my CNC software. 

This joint was not easy to create the toolpaths for.  It took drafting skills I learned in high school and the great drawing tools in my CNC software to create.  Tips of the fingers are the same width as the valley between them. One half fills the center area left by the other half.    The tapered sides were accomplished with a 3 degree tapered end mill.  It has a 0.125" diameter tip, 3 degree tapered sides, and just a little over 1" of cutting depth. 

I'll use this joint for top and bottom zebra wood caps on 1.5" diameter cherry dowel legs. Applications are anywhere you want to join round wood parts end grain to end grain. Only limited by your ability to clamp parts vertically within your CNC cutting limits. If you do use this joint please consider referring those who see it back to this post.  

With straight cut finger joints there is always a conflict of fit. A battle of wit. Too tight and the fingers may not fit together at all. A perfect match and while they do fit together they are a challenge to assemble and any glue in the joint gets scraped away when you do assemble them.  Make the joint looser and you have a loose fit that glue ends up filling across gaps. By CNC cutting with 0.001" accuracy the fit of these tapered joints is both easy to apply glue to and assemble, and will go together tightly with even contact between inner surfaces.

3 degree taper between fingers. 
Test cut example. It is critical to center the toolpaths for each side of the joint. Check back for final project images. 

Comments are encouraged and welcomed.

4D   


Wednesday, March 26, 2025

CNC cut Hardwood Dowel Joinery

My first job out of college was for a furniture company noted for the metal framed residential furniture they made and sold. It was all designed to quick assemble.  No welding of metal parts. Clever engineering of steel connections made their furniture go together rigid and precise. One connection they used between small tubing into larger tubing was to taper the end of the small tube, then pull it tight into a slightly smaller die-punched hole.  This post is about a wood version of that connection.  

For this sample a three degree tapered end mill, a 3/8" diameter wood dowel, and a 1" diameter wood dowel are used. 

Taper the dowel and the hole

A 90 degree connection that wedges tight and stiff with no glue.  Draw tight with a wood screw. 


Pocket hole screw

Clean, precise, and easy to create.

The small dowel end was pre-drilled for the pocket hole screw. 

Pre-drilled for screw threads
Trapped tight in the tapered hole there is no chance the small dowel would split. The counterbored hole for the screw head could be covered with a wood plug. For a coffee table or end table a frame made from dowels using this joint could have the side frame pre-assemble and only require the end stretcher dowels to be screwed into the legs.  A simple wood frame that is rigid with clean joinery and no glue required. Hardwood dowels are available in many species. Imagine a tempered glass top resting on the frame to finish it off. 

Taper theory:   Wood dowels are imperfect. If they have been exposed to humidity changes after production then they are usually out-of-round by a few hundredths. Drill bits make round holes. A straight dowel end (likely a bit wider than thicker) into a straight hole drilled into wood is either loose in one axis, loose all around, or so tight you have to pound/press it into the hole. Pressing it into the hole will wear off the fat side or deform the hole to accommodate the oblong dowel end.  Use a CNC with precision down to 0.001" to recut the end to a "perfect" tapered shape and a "perfect" matching tapered hole. There is no abrasion between dowel and hole when inserting until near the bottom when the tapered sides start to press against each other. Tapping or pulling the dowel in the last 1/32" or so presses the sides together.  Uniform contact around the perimeter. Friction all around. 

Comments welcome!
4D


Wednesday, February 5, 2025

Wedged Tenon Joint for my Landscape Model Stand Design

Test Sample
My Landscape Model Stand posted here used a wide floating plywood tenon between the feet and the vertical legs. It was never intended to come apart.  This joint is one of a few different prototypes to use as an alternative connection.  It has to be snug with no flex when together, yet not glued so that it can come apart. 
Embedded Square Nut
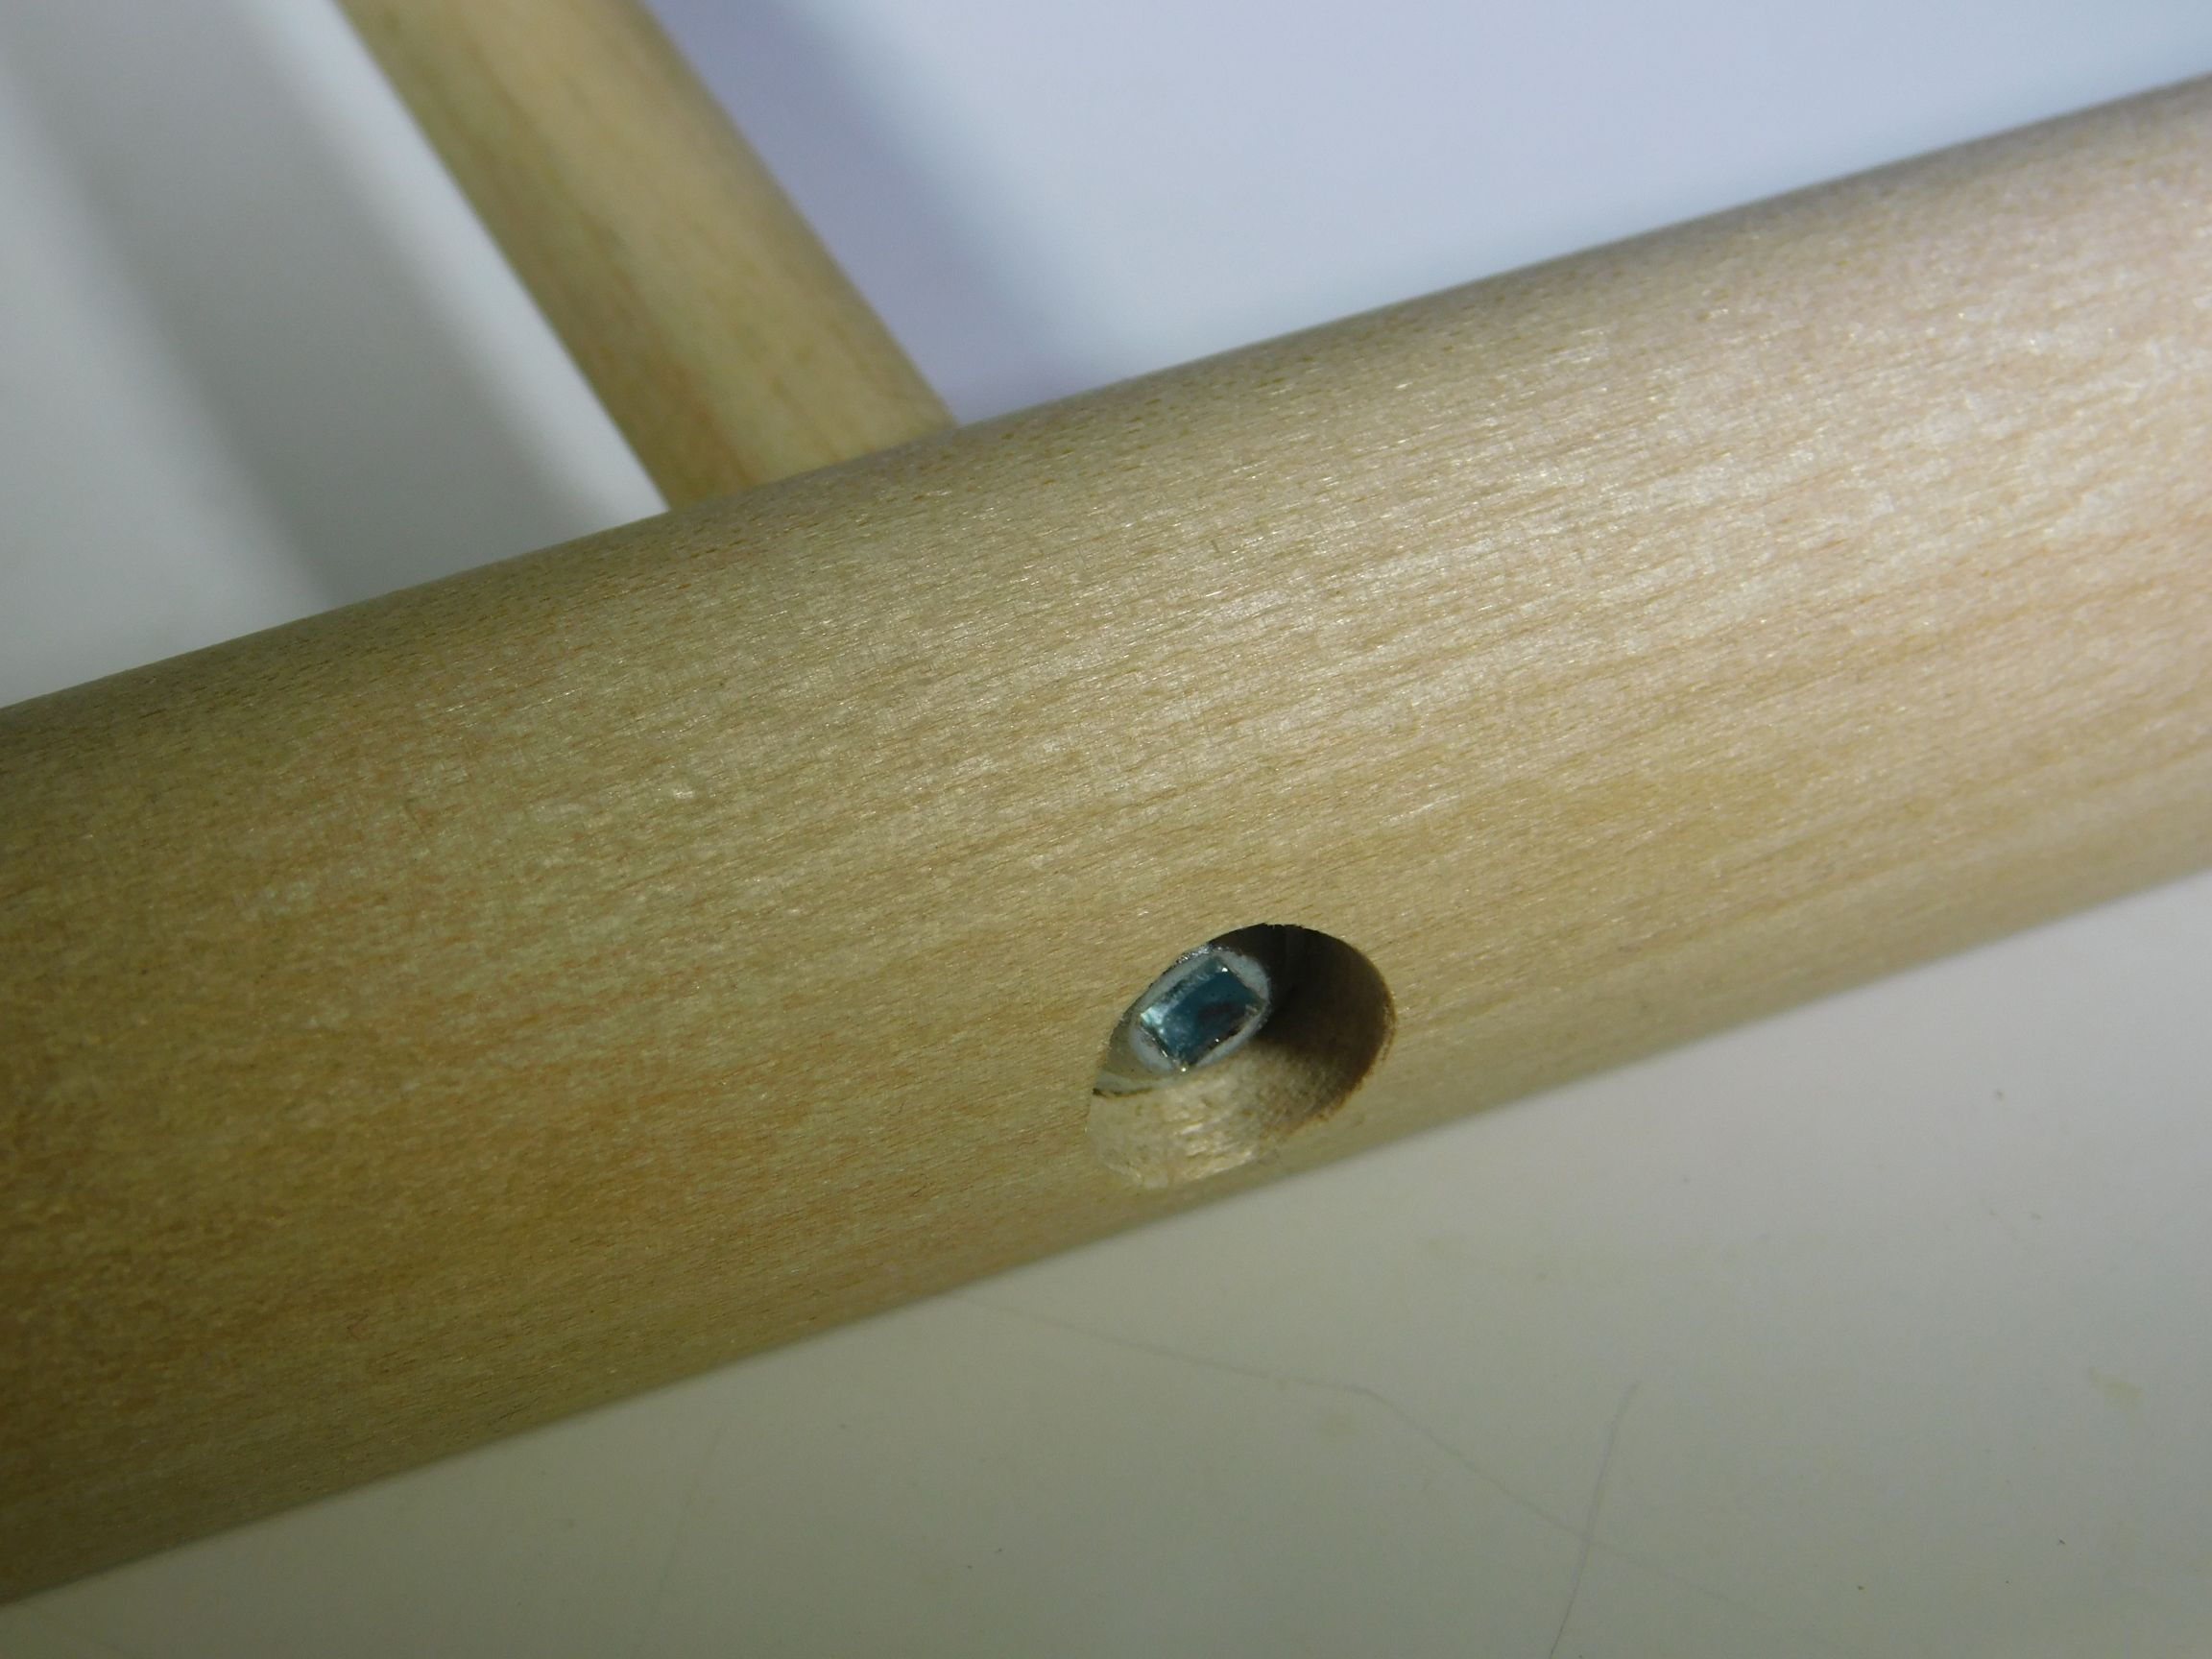
The mortise was cut 1/16" deeper than the length of the tenon. That allows the screw to pull it in snug and not bottom out. A square 1/4-20 nut was embedded into the bottom of the tenon. The pocket for the nut was cut with a 1/8" spiral end mill. Metal threads being more reliable than threads cut in wood. 
A flat head 1/4-20 bolt pulls the joint tight.
When the wedged sides are pulled together there is no gap or play between the mortise and the tenon. Yet it slides in easily until snug. 
Together tight with no play.

Creating the toolpaths was tedious, and cutting the mortise and tenon sides took considerable time.  I realized after cutting this sample that I do have a 3° tapered end mill. It would have been quicker to draw up toolpaths for and using it would be much faster than using a 1/8" end mill and the fluting toolpath to cut sloped sides of both tenon and mortise. 
3 degree tapered end mill version.

Making the foot out of the same strip of wood as the leg is simpler than making a unique foot from wider material. The design requires a very stiff joint with no flex or wiggle when together.  This wedged joint drawn together with a machine screw satisfies that requirement. Using a stainless steel nut and bolt they won't rust when exposed to the moisture in the wood. I have seen that happen in previous designs of mine. 

Now that I have the details figured out and simplified, I'm making a knock down version of my model stand using Philippian Mahogany.  Light weight yet plenty strong for the application.  2" wide by 3/4" thick legs and feet.  A 3" wide shelf. Stainless steel nut, bolt and hinge at the top. This type of bolt rather then the flat headed bolt used in the test piece above. 

3/8" diameter Aluminum dowels hold the shelf against the legs although if I could find some stainless steel rod or tube already 3" long and 3/8" in diameter I'd use it. 
Test Assembly
A stainless steel hinge recessed flush into their sides holds the legs together at the top. 
Hinged together at the top
With the hinge at the top and the shelf in place the triangle created locks the geometry for a rigid structure. The light weight Philippian mahogany used makes the whole assembly easy to pick up to move about. Slide the shelf off and the legs will fold together for a 1.5" thick flat package that stores easily.  Standing up spread out several of these will nest together.  They can also be stacked, although at 5' tall each the stack would grow in height quickly growing  3" or so with each one added. 

A photo of the assemble design. Note the two black bolts near the bottom of the legs which hold the feet securely.
Stand.  Ing Tall. 


Update 3/1/2025:  The mahogany I used for this stand has some internal stress, and as such the shelf wants to twist and slip back from the legs on one side.  To help it stay in place I bought some rare earth magnets with a hole in the center for a #4 screw. 
Rare Earth Magnet
First to replace the aluminum rods with steel rods. Then screwing a rare earth magnet into the bottom of each hole. That will keep the rods and shelf firmly in place yet allow removing the shelf with a simple tug to overcome the magnetic pull. 

3/8/2025:  Now with some cherry stain and Minwax Polycrylic on it this latest version of my model stand/easel posed for a few pictures:


In summary, the wedged tenon drawn in with a bolt works well.  Of course that joint took my CNC to make, but my CNC is just another tool among many that contribute to the fabrication of my designs. 

Comments welcomed.  
4D  


Friday, November 8, 2024

Blind Double Dovetail Joint

I used this joint once in the past for a student's project. I stumbled across a need to use it again while iterating on an end table design. It allows dovetailing a board into the face of another board with no obvious entry point. Drop in.  Slide over and the board won't pull out. Dovetailed sections with a slight taper do the job. 
The taper of the dovetail keys makes them easy to insert but wedge up tight when slid over. 
Cherry 4" wide into mahogany face 
I'm toying with a way to lock the joint in place when assembled.  Of course gluing them would work. This is to connect them without using glue.  First idea would be to use a spring loaded pin that would pop out and prevent the joint from sliding back to remove. Another idea is a pop-up plate that blocks the dovetail section from backing up once passed. Conical springs behind the plate would allow it to be pressed down out of the way when the board is first inserted, but then pop up when it slides over.  
Drop in, slide over for a snug connection.
Should I come up with a locking idea it'll mean the boards will need to be sanded and a finish applied before final assembly as they won't come back apart. The fit can be tested before the locking pin or plate is put in place. 

I used a 1/8" spiral end mill to removed most of the area before the dovetail bit undercut the edges. 1/2"d 14° dovetail bit.  On the cherry board end a 1/4" spiral end mill was use to pocket cut the areas between the dovetail section. 

As the joint is only 1/4" deep it could be done on the opposite side as well. You could simulate a board that passes through another board.  Using my angle clamping jig and some careful layout the board could intersect at any angle up to 15 degrees or so from perpendicular. Rotate the joint intersection for a compound angle appearance. 

4D

Sunday, July 7, 2024

CNC Cut End-To-End Finger Joint

I cut this joint as a sample to show my college furniture design class students. Originally just an idea I had to prove would work.   I haven't found a practical application for it yet, but that was true for every original joinery idea I came up with.  So far roughly 50% have found applications in student furniture projects. 

Stacked Sides
Each side was cut using the same vectors.  Cut inside the vectors for one half, and outside the vectors for the other half.  A -0.003" allowance was used for one side. This joint pattern can be extended for any wider width of  boards.  Done with a 3/16" diameter spiral upcut router bit.   The bit diameter was what specified the shapes and radiused corners..  From the outside the joint looks like simple interlocking fingers. 
Closed
Slid apart the secret begins to reveal itself.
Slightly Apart
When together the joint can't slide sideways or up and down.  Locked in two axes. 
Apart.
To cut the joint required clamping the boards vertically in my CNC frame.  

While the halves slip together relatively easy once glued the considerable surface area between the sides would make for a very strong joint. One option might be to make each side from a different wood. Split a table top making one half walnut and other half pecan perhaps?  

4D