Search This Blog

Showing posts with label maple. Show all posts

Saturday, October 11, 2025

Nesting Boxes.

 As my collection of wood scraps vary in length, width, and thickness, it occurred to me that a series of boxes that nest together might be a fun project to make.  Open the largest one to find a slightly smaller one inside.  Open that box to find an even smaller box inside it. Open that smallest box and there may be a surprise to find inside it. 

This story is not yet complete, but it starts with one box.

One Box. 2.625" x 1.75" x 1.5: tall.

Open the lid to find the lid of another smaller box.

Something inside.

Remove it to discover that lid covers another box.

Box #2. 2.25"x 1.375" x 1" tall.
Open the lid of box #2....
To find Box #3.
Box #3 is missing a lid.  The lid will have a dovetailed edge that slides in from the side.  That lid is yet to come. 
Three nesting boxes. 
With a range of router bits available, and a range of scraps in varying thicknesses available, CNC cut boxes can be made in a range of sizes.  The smallest box is 1.75" x 15/16" x 7/16" thick. It was cut with a 1/8" diameter bit.  An even smaller box may come, as I do have a 1/16" diameter bit.  Larger purely CNC cut boxes are limited by the length of the available bits and the Z axis range of my CNC. A constructed box with 4 sides, a bottom, and a lid may yet encase these nested CNC cut boxes.  Time and the available wood scraps I have will tell. 

4D


Saturday, August 9, 2025

Small Trays Made From Leftover Scraps

I have A CNC. I have a bottle of wood glue, and several clamps. I also have several small odd shaped wood scraps begging to be used for something useful.   

Small scraps glued up can make larger boards. Here are a few shallow wood dishes/trays all made from glued up scraps.  

This first oval dish was cut from three maple scraps glued together. I used my CNC to cut the top recess and rounded edge.  Then used my router table to bevel the side 11.25 degrees, and follow that up with a small 45 degree transition to the bottom.  

Oval Tray
This second tray was the best shape to make from two glued up corners saved from a hexagon table top cutout. 

Diamond Tray
This walnut version was made from several walnut scraps. Add in patching two screw holes with walnut dowels to increase the potential final size. For this one I used the modelling tool in Aspire to create the center recess. It also has a 45° chamfer on the bottom edge.  A rounded rectangle.
4" x 6"
This 4" x 4" Cherry example required several bit changes, and used the VCarve toolpath to make the crisp inside corners of the dish. It
 used up the left over corners from a round plant stand cutout. Its shape echoes the shape of the glued up corners. 
V-Carved Cherry Dish
Several bit changes were required.  Bits used (in order) were a 3/16" end mill to clear out the center area of the dish, then a 60 degree V-Bit to slope the sides and create the sharp inside corners. A 1/4" end mill cut a clearance path for the final bit and profile out the final shape.  Last bit used on the CNC was a side cutting V-bit to put a groove around the sides as shown below.

VCarved, V-cut, and beveled. 
As with all of these trays some follow up work was needed.  The waste perimeter was roughly cut off using my bandsaw.  A flush trim bit cleaned up the bottom edge on my trim router table.  Lastly a 45 degree chamfer bit beveled the bottom edge. 
Beveled bottom and side groove.
Lastly, an octagon dish. Made from one scrap board nearly 11" long and 2.6" wide.  It had a rough bark side.  I cut it in half and glued the good sides together to make a roughly 5" x 5" block close to 7/8" thick. The inner and outer sloped sides were 3D toolpaths.  The center of the top was a pocket toolpath to bring it down to the bottom of the inner sloped sides.  Hard maple with tight grain cut nicely on the CNC. 
Octa Dish

These are small examples of the value you can find from small scraps of wood left over from previous projects. Glue thin scraps together to make thicker boards that may be more useful. Any scraps with a straight edge can usually be glued up to make a larger board.  A trip across a jointer may be needed to face the edges for the best glue joint. I have a small benchtop jointer that is perfect for this task. Its small expose blade gap between tables make it safer than larger jointers with a larger expose blade gap to slide over. 

So save those odd scraps.  When boredom or inspiration strikes take a few and glue them up to make a larger board that can become something useful.  

Comment encouraged!
4D

Friday, April 26, 2024

Innovative TV Tray Table. Maple. 4th Variation


Maple with a maple stain.

This version, made from maple hardwood, uses an original outer leg design but retains the upgraded details from the previous versions.  
Three other versions:
Shown with the top flat and level above, the design inverts when you flip the top and pull the top stretcher through.  Once inverted the geometry leaves the top slanted down with a projecting ledge at the bottom. 
Slanted Top
This leg line runs straight from the table top connection down to the floor.  The offset that makes the dual geometry work is done at the pivot point between outer and inner legs. A more direct line and simpler detail than the legs on the previous versions.  While this version also folds up minimally 2" thick for storage or shipping, it looks unique compared to the 3 other versions when folded flat. 
Folded Flat. 2" Thick
Outer legs bolt to the top and inner leg frame. On my Cherry version I came up with a pivot pin that gets trapped in place by an intersecting binding bolt shaft.  The legs and bolts can pivot freely but won't loosen,  They won't come out unless the binding bolt is removed. I used that same strategy in this Maple version. 
Pivot pins.

Center Pivot Point

Upper Rear Corner
I'll confess that hard maple put up a fight during the process of turning it into a TV tray table.  Look close at this prototype and you will see a few war wound scars.  Not all wood from Maple trees is the same. I recommend southern soft maple rather than northern hard maple if you want to make your own from maple.  I've used a mix of both in this prototype.  I threw in a strip of red oak to define the front edge.  The ledge strip on the slanted side is Bubinga. 

This Maple version has a single webbing strap between the center of the top's back edge and the top stretcher. The strap runs from stretcher to rear center edge of the top, folds over, then back to the stretcher. An intersecting binding bolt pierces a grommet in the fold of the strap to hold it in the slot. The 60 degree triangle helps reduce any chance for the inner leg frame to rack. Using strap it is wise to make sure they don't wrap over any sharp corners/edges.  This is the slot cut in the back edge of the maple table top for the strap:

Smooth edges for the strap to wrap over.
The strap runs from the top's back edge directly into the stretcher when in the flat position. In the slanted position the strap runs over then into the stretcher. Binding bolts pass through grommets in the ends and center fold of the strap to hold them in their slots. The angled strap helps keep the frame from racking. 
Strap Connections
Iteration.  There are several variations of details that can be made that utilize the same geometry of my patented idea. Within each the path to finding a great visual composition is done in steps.  What may seem fine in 2D elevation views of a design may not seem as cohesive in detail with the whole composition when viewed on a 3D standing prototype.  Willingness to refine a detail before finalizing the build is a useful quality to possess.  That was the case with this detail:

Original "bump". 
You can see my sketched alternative idea on the top leg.  The original bump to surround this critical offset bolt hole was an unpleasant visual distraction when I first assembled this table. A fat point on a svelte frame. As the legs could be easily removed and returned to my CNC bed I had the CNC recut this area of the legs. 
Svelte Frame
This design is patented. The details can vary, but the geometry that lets the table stand flat or turn inside out to be slanted down is the unique property.
 
For information on licensing the design please contact:
Sarah Nolting
Licensing Associate
Kansas State University Innovation Partners
(785) 532-3910
snolting@ksu.edu
www.k-state.edu/innovation-partners


Saturday, August 27, 2022

A Folding Desk

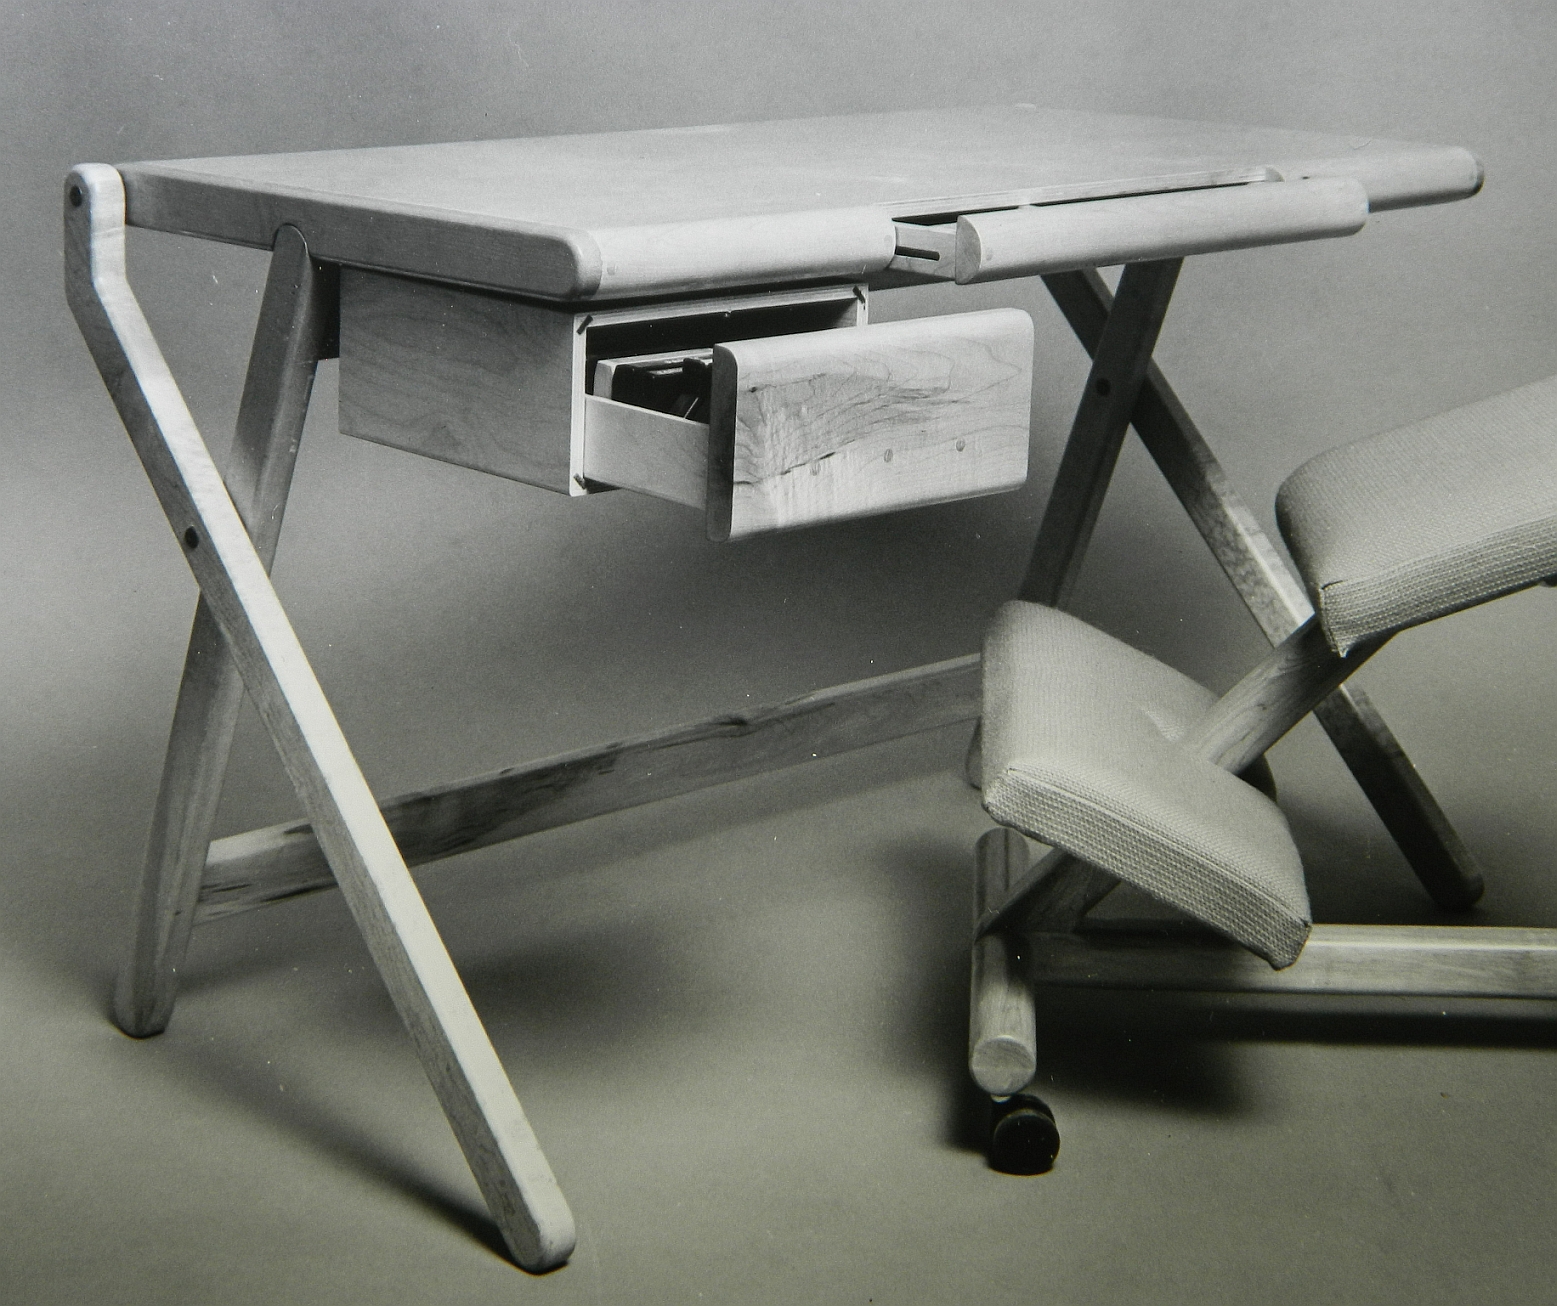
This is my PhDesk. I designed and built it in 1981. This original has a 12mm thick Baltic Birch plywood top, trimmed by 2" wide solid maple sides. The bottom panel is 1/4" thick hardboard. The front and back trim is rounded over to compliment the maple base details. It has a center pencil drawer that can be locked shut when the desk is folded up to carry.  The asymmetric X base folds up easily. The desk is 4" thick when folded flat.

PhDesk with Side Drawer
4" Thick when Folded
It was designed and built when I was a college student and moved several times. I wanted it to fold up so it would be easy to carry and would take up minimum space in the back of my small car. It won 1st place in the case goods category of the 1982 IWF Design Emphasis student furniture design competition. 

Several copies of this design were built for family and friends. My Furniture Design professor liked it enough to make his own copy of it while I was in the workshop making one.  Most have survived including my original prototype.  It was picked up by a furniture manufacturer who thought they could sell it to a line of kitchen accessory stores. They showed me a factory sample made from oak, but never succeeded in selling any.

Oak sample
My original has survived 8 moves so far.  It spent several years as the office desk for a local ophthalmologist. I retrieved it when that office closed.  

It is 24" deep, 29" tall, and 42" wide.  

In Use. TI994A workstation.
One flaw in the original design is that if the front of the desk is lifted the desk may collapse. This "feature" is a source of surprise and consternation for the unsuspecting. Curious spectators are tempted to lift up the front.  That challenge was solved with a strap that attached to the center of the top stretcher and connected to a slot in the underside of the desktop.  The strap is strategically designed to also let the desk fold up. 

My award winning success with the PhDesk, Fit Lounge, and an unfolding Z chair design caught the attention of the university and led to them hiring me to teach the furniture design courses. 

Comments are encouraged!

4D