Search This Blog

Tuesday, April 12, 2022

Woodworking Education: Tiny Table 4

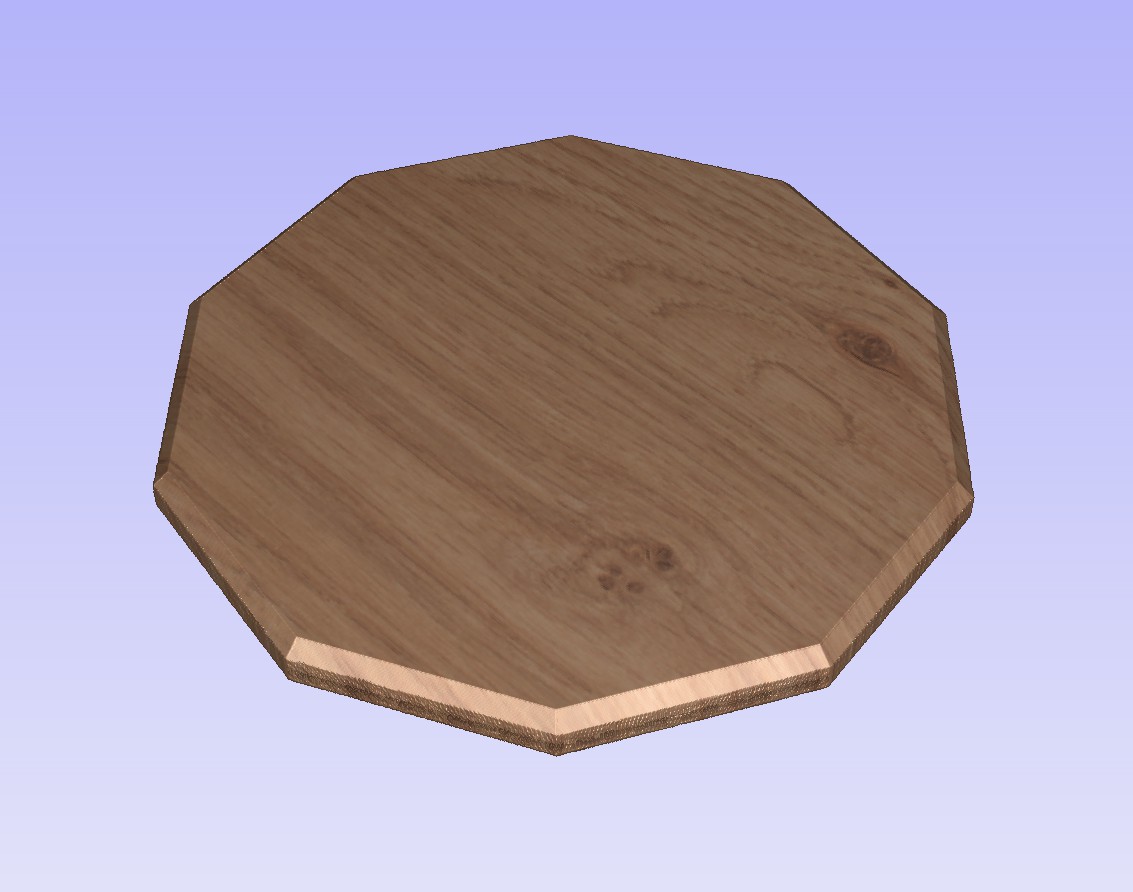
Tiny Table 4 is another example for the final beginning workshop class project.  This charging table example is also 24 inches tall with a 9" diameter decagon (ten sided) top. It is also another example of detail continuity throughout the design.  These four Tiny Table projects are made as initial diverse examples to show and inspire the students. The creative projects designed and built by students of this class will become the new examples to show and inspire and challenge the next class of students. Rather than have the next class start from scratch with this project each class year sees a new baseline to challenge them to improve upon.  

Top face of decagon top.
The top started out 1.157" thick.  The top side has a 45 degree chamfer around the edge to help the edge look thinner.  The chamfer also catches light differently than the top, adding visual complexity/interest to the simple top. 

Decagon Top. Bottom view.
The bottom face of the top is carved to emphasize the ten sides as well as reduce the visual thickness of the wood slab. 

This project teaches how to chamfer the perimeter edge of the table top.  It also teaches a simple way to make an interesting 3D shape on the bottom face of the table top using the CNC software.   With the CNC software installed in the college computer lab, students are assigned to design their own 9" maximum table top, then save the toolpaths for it to cut on the small CNCs.    

There are 5 legs. Five legs provide the most efficient and stable footprint for the nearly circular top. All legs start at 3/4" thick.  The legs taper inward to just a bit thicker than .5" at the top inside corner. 

Beveled Edge and Tapered Thickness

The outer edge of the legs has a double chamfer that matches the corners of the top above them. The top edge of the legs is shaped to echo the carved underside of the top above them.

Top End Profile
The leg elevation view tapers down to 1.25" wide at the bottom. 

One of 5 legs.
The legs are a complex shape and require several processes to produce. This project teaches the logical sequence and tools used for the steps needed to produce it:
 
1. While the board is still a rectangle, cut double bevels on the straight outer edges of the legs. Use the table saw with blade tilted 18 degrees.
2. Cut out duplicate parts (5 legs) using a template. Use double sided tape or a few spots of hot melt glue to attach the template to the leg board.  Rough cut within 1/16" or so with the bandsaw and use a flush cut pattern bit on the router table to trim flush to the template.
3. Layout and cut mortises.  Use the mortising machine or the drill press with a Forstner bit followed by chisels to clean out the mortise. Or potentially start with a slot cut using an end mill in the router table followed by some chisel work to square the mortise.  A CNC configured for clamping boards on edge could also be used.
4. Taper both sides of the leg thickness from outside to inside edges.  Use a sled with shims to tilt the leg slightly (2.7 degrees) and run through a planer or the horizontal drum sander. Repeat on the other side but shim the board 5.4 degrees. Shims can be cut using the bandsaw. The digital angle gauge can check the shimmed angle. Hot glue in place before running through either machine. 
 
Short 1/2" thick stretchers are mortised into the inside edge of the legs.  The inner end of the stretchers dovetail into one face of the 5 sided center hub sections. Top and bottom edges of the stretchers have a small double 18 degree bevel to perpetuate the table top corner angle detail.
Top Stretcher Dovetail End

Top Stretcher Tenon End
There are two center 5 sided hub sections.  One is 2" tall underneath and connected to the top. The second is 3" tall and roughly halfway down the legs. The hubs connect all the legs together. Stretchers from the legs dovetail into these hubs.  Exposed ends of the hub sections are shaped to a shallow peak to contribute to the overall design aesthetic. This project teaches how to make a 5 sided block, and how to cut dovetail slots perfectly centered on the sides of a 5 sided block.
Top center hub.
There are 3 other Tiny Table examples that along with this one will show students the level of detail and range of creativity they are expected to achieve. The continuity of details in this project add to the story that can be told about it. It is the story about the table details more than a quick glance at it that make it memorable and more desirable.   

More related educational projects are here:

Woodworking Education: Learning the Actual Costs of Their Projects.

Students rarely know to ask, but fabrication of wood or metal projects can be very costly. In a beginning woodworking class it is helpful to have students know the actual cost of everything they use and keep a running tally of it all. Even if they aren't paying directly for provided things such as glue and sandpaper it helps if they know what those things actually cost as they consume it. 

While it may be more economical to provide glue in gallon jugs that all students will share, this doesn't make it easy for them to care or know how much they use in a semester for their projects.  

Provide a small bottle of wood glue to each student that they can put their name on and keep in their personal locker. Small bottles can be bought in large packs. Tell them the actual cost of that bottle.  They will know how much they use and can easily keep track of the cost. The same can work with sandpaper.  Issue each student a stack of sheets in each suggested grit they use. 80, 120, 180, 240, 360.  Each higher number is 1.5 greater than the previous grit save for 240.  Let them know how much each sheet is worth. Encourage them to put their name on the back of each sheet, and then each half or quarter sheet if they split it.   If they need more glue or sandpaper then issue them more, but remind them to record what they would have paid for it. Finishes used and brushes and rags and cleanup materials all cost something. 

If you provide wood or metal for their projects then give them a fixed amount of virtual money they can use to "buy" the wood or metal with at its actual cost per board foot or linear foot.  If they purchase or provide their own material they should keep track of what they actually would have spent for it. 

At the end of the semester have them turn in a balance sheet.  Having kept track of their actual costs (even if everything was provided to them) will ease sticker shock in later classes when they are asked to actually buy the wood or metal they will use in their larger projects.  Having a good idea of actual production costs will help them price future work they might want to sell.  A good lecture on overhead costs to consider is also recommended. HVAC, Electricity for all the machines and lights, Trash disposal, shop cost (rent or monthly loan payment and property tax), etc..   This project is a great filler for moments in class when there is nothing else to do. 

Monday, April 11, 2022

Furniture Design Education: Spatial Mockups

In the large high-ceiling studios and workshop/fab labs where students design and then build their designs it is deceiving to judge the size of furniture designs meant for residential spaces. 

A large table or sofa may look right at home in the workshop or studio, but overwhelm any space you install it in at home.

A spatial mockup of a student's design volume at home or apartment can be eye opening. They can use boxes or other furniture with a sheet thrown over to fill the volume.  Sometimes just a tape outline on the floor will do. For tall designs such as shelf units a tape outline on the wall is recommended.  This is usually enough to convey the spatial reality of their proposed design in its intended final resting place.  Require photo evidence of the attempt.  I promise you at least a few students in every class will end up reducing the dimensions of their design proposals.  Without this step in the design process we see "monster" projects from a few in every class.   

I speak from experience as I still have the coffee table I built as a student.  It lives in my basement store room.  I hide under it during tornado warnings. As nice as it is, my college coffee table could serve as a dining table for 4 if it was just a bit taller.  In the college shop it looked great, and no one imagined it would overwhelm most residential spaces. 

You can extrapolate this concept to furniture intended for large commercial spaces or even outdoor installations.  This is where 3D rendering software can help foresee the spatial reality of  furniture designed for the space. You have to model the space though. The model of the furniture alone doesn't answer the "Too big or too small?" query. 

4D


Sunday, April 10, 2022

A Simple Saw Horse Design

A Clean Design.
There are many a-frame saw horse designs out there. Each time I see a YouTube video of someone making saw horses I think there should be a simpler way to make one that is also better in at least a couple ways.  

A-frame designs want to spread out when loaded and as such most designs use a chain or shelf to keep that from happening.   Others resist the legs spreading with a metal or plastic or plywood bracket/flange to connect the parts at the top.  

By simpler I mean no chains or brackets or hinges or shelves to keep the legs from spreading apart. Two common bolts with nuts is all that is needed to hold the base halves together at a critical point to make this design work.  

By simpler I mean no more than 2 unique parts (legs and stretchers) to make the base with a common 2x4 or 2x6 to serve as the top bar.  

The design takes advantage of gravity to grip the 2x4, and also has the options of bolting the 2x4 to the base or simply trapping the 2x4 to the base. As gravity pulls the load on the top down, the legs try to spread but are prevented by the 2x4 which the legs simply grip harder. 

My sawhorse can fold up.  
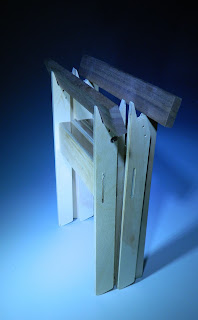
Folded and Standing.

Two or more can also stack atop each other for a minimum storage footprint. 

Stacked Neatly.

Mine comes as flat parts to be assembled, and can disassemble back into flat parts. Flat parts box easily and are efficient to ship and take less room stacked on store shelves than assembled sawhorses would. 

Flat parts for two sawhorses.
When opened up the legs can optionally be locked in position with secondary bolts.

The 2x4 can optionally be bolted to the frame.  

All  parts can be cut from 18mm or thicker plywood using a CNC, and a single router bit can be used for every detail of the design including countersinks for the bolt heads and mortises for the tenon ends of the stretchers.  

The stretchers between the leg sides can be connect at least 3 ways:

1.  A slip through and push down joint that wedges them snug with no hardware.

2. Use an embedded nut or cross dowel with a machine screw through the legs to stay snuggly attached in use. 

3. Lastly the stretcher tenon ends can be glued into mortises cut into the legs. 

My 1/4 scale model of this design is shown in the photos above. It works as intended, but lacks the final fine details possible with a full sized model. 

Using a 34" x 24" scrap of 3/4" lumber core birch veneered plywood I made 4 legs and 2 stretchers to build a sawhorse base for my small Cutech jointer.   A piece of poplar that was 1.5" thick works as the 2x4, and attaches to a top made of oak that the jointer rests on.  The jointer bolts onto the oak top.  The top fastens to the poplar rail.  The poplar rail is screwed to the back legs of the stand.  It could optionally be also screwed to the front legs to completely lock the geometry of the base. 

Shorter versions can be used as base legs for tables or desks.  A bit taller and they could be used as legs for a workbench/layout table.  

If you have a CNC, a 30" x 20" piece of 3/4" nominal plywood is enough for all the parts of  one desk leg sawhorse. Double that for two. These would hold up a 24"x48" butcher block top.  Provide your own 2x4 for the top rail(s), or tweak the leg shape a bit and you could use two slices of the same plywood as one top rail.  Glued together they would be just a bit thinner than a 1.5" thick 2x4.  3/4" plywood is rarely 3/4" thick in actuality. 

4D
Lattice Table. A Twisted Tale

Teak Lattice Table

This lattice table is one outcome from a rabbit hole I fell down researching Yurts. I actually made my own small prototype Yurt including a curved door, lattice sides, tarp walls and roof.  Just to educate myself on the intricacies and details of Yurt construction. I still have all the component parts, although they are destined for recycling or upscaling.

The bending potential of wood when cut into thin strips is a property not often taken advantage of in furniture design. A cylinder tube made of latticed strips is surprisingly strong. If the intersections are single screws then that lattice tube can be opened up to a flat circular strip rope, or closed down to a twisted pole. Add something to lock the geometry such as a top and you have a small table.  Change the size of the circular top and the lattice will adjust to fit it. As the lattice will only touch the top perimeter where the ends meet the top shape could be a 10 sided (or 12 or 14 sided) polygon. 

This lattice table has an added spinning top. It has been used as a plant stand to sit next to a window or glass paned door.  Vining plants can drape over the edge to weave through the lattice if they want to. As plants tend to grow toward the window/sun it helps to rotate them a little every day to keep the plants balanced.  

Sub Top

The top is teak veneered plywood.  A scrap I had.  The lattice strips are slices of a teak board.  Stainless steel nuts and bolts pin every intersection of the strips.  At the top the lattice screws into the edge of the sub top.  A lazy susan bearing between the top and the sub top allows the top to spin.  A single bolt through the sub top into a threaded insert in the bottom of the spinning top holds the tops together.  

For more interesting lattice shapes the hole spacing can be varied. The hole spacing of inside strips should actually be slightly closer together compared to outside strips. Their circumference is slightly smaller than the outer circumference. Pi times diameter.  For a 1/8" difference between inner and outer strips the circumference varies 0.785".  End hole to end hole distance of the inner strips of a 12 strip (6 inner and 6 outer)  lattice would be close to 1/4" shorter than of the outer strips. If the hole spacing is precisely done (CNC cut perhaps) then when assembling the lattice it would naturally start curving into a cylinder. 

I made a production run of a plant stand versions using 3mm baltic birch plywood as the strips and a painted MDF top held on by snaps. As the lattice base can expand or contract I offered versions with 8", 10", or 12" tops using the same base. A plant stand that could grow with your plants. The top of the lattice had snaps attached with pop rivets.  

4D

Comments welcomed and appreciated. 

Little Twister. A Simple, Quick, Accessory Table or Plant Stand.

Little Twisters I like to make when I have a few scraps left over from a larger project.  The lattice strips can be ripped from a narrow board.   The top can be any reasonable size and either a single wide board or glued up from narrow boards. This one is made from some teak scraps. 

Little Twister
To make the lattice strips I check for grain direction on the board I'll cut them from. Very straight grain is desirable.  I'll draw a straight line parallel to the grain near one edge of the board, then bandsaw down that line.  I'll then joint that edge before moving back to the bandsaw rip the 1/8" wide strips.   Rip one, then joint a new edge.  Repeat until I have 10 strips minimum, all with one smooth face.  The strips then get sent through my drum sander rough side up. Once smooth I trim them all to exactly the same length. 

Holes are drilled at my drill press.  I'll set up a back fence and a stop block to ensure all holes are centered and the same distance from the strip ends.

The arc at the top and bottom of the strips is sanded off at my disc sander. I have a little pin jig I can impale the strips on before spinning them against the sanding disc to round them off.  The edge of the top board is rounded to propagate the arc detail from the strip ends.  

I use stainless steel nuts and bolts to assemble the lattice cylinder.  Stainless steel wood screws attach it to the top. 

Comments and questions welcomed!

4D

Accessory Table. 5ft.

Tables with a round top ask for a nice base that looks great from all angles, and contributes to rather than distracts from the overall aesthetic.

This little 5 footed table stands sturdily and proud. Made from Cherry wood, and finished with Danish Oil.  The top has a French Ogee profile to add a little style. 

Legs are made from 3 parts joined together with mortises and tenons. The legs all dovetail into a 5 sided center hub at the top and lower down. Leg parts were rough cut then trimmed to identical shapes with a template and pattern bit on the router table.   

A nice stance.

No bad views.
The design evolved through iterative sketches. No design of mine falls directly onto paper. An initial sketch might be nice, but iteration never fails to improve upon the aesthetic appeal. How the design is made also evolves through iteration. 

Comments welcomed and appreciated!

4D
